How to Make My Pet Talk With AI: A Simple 2026 Guide
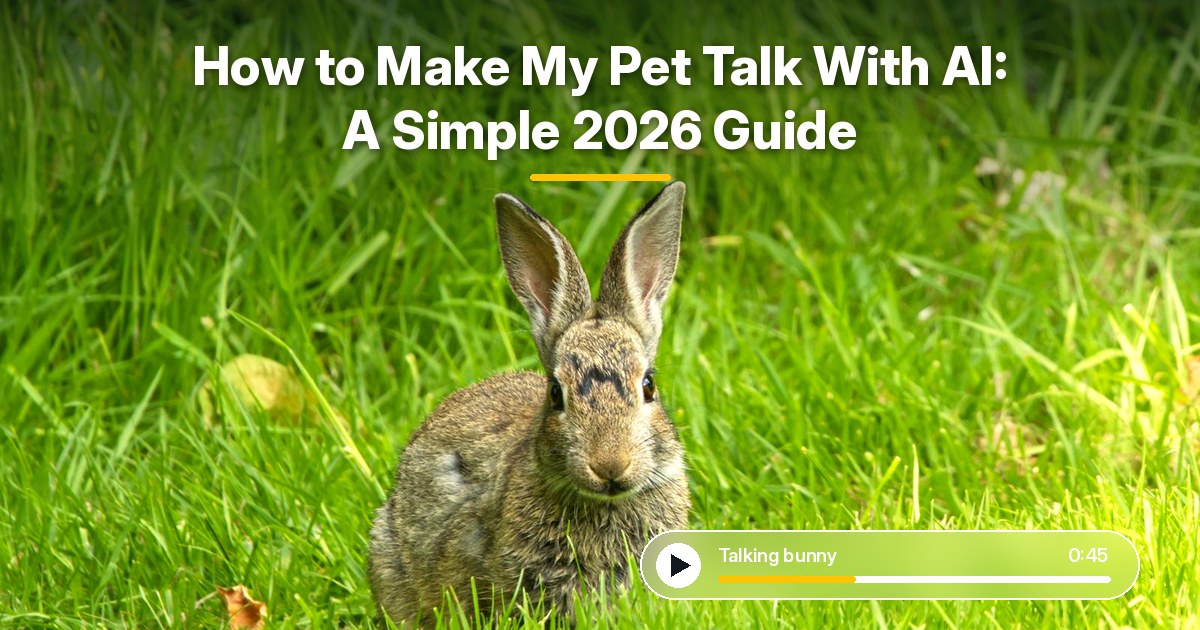
Here is how to make my pet talk with AI in Zoice. Upload a clear photo of your pet, add a script, a recording, or a cloned voice, pick a voice and a size, and let Zoice make the video. You do not need editing skills, and the whole process takes a few simple steps.
This guide works for dogs, cats, bunnies, birds, and almost any pet with a clear face. We walk through each step in Zoice with a bunny as the demo, then share tips for better results and fun ideas for your first video. Have a dog or a cat? Read our dog talking guide or our cat talking guide, or compare the best AI talking pet generators.
What You Need
You only need a few things before you start. Gather them first, and the steps below go quickly.
- A clear photo of your pet: front facing, with the eyes open and the face in clear light
- A script, a recording, or a voice: type the words you want, upload audio, or clone a voice
- A Zoice account: avatar videos start on the Starter plan
- A short idea: one story or one message works best for a first pet video
If you search for a make my pet talk app, a talking pet AI tool, or an AI pet voice, you will find many options. Zoice runs in your browser and gives you control over the voice, the language, and the size of a talking pet video.
Make Your Pet Talk in Zoice, Step by Step
Here is how to make my pet talk with AI in Zoice, one click at a time. Each step shows the exact screen, with a yellow arrow on the button to click. For this demo we used a bunny named Clover, the Cartesia Sonic 3.6 voice model, the Sarah voice, and 720p output. The finished video runs 45 seconds.
Step 1: Sign In and Open the Zoice Home
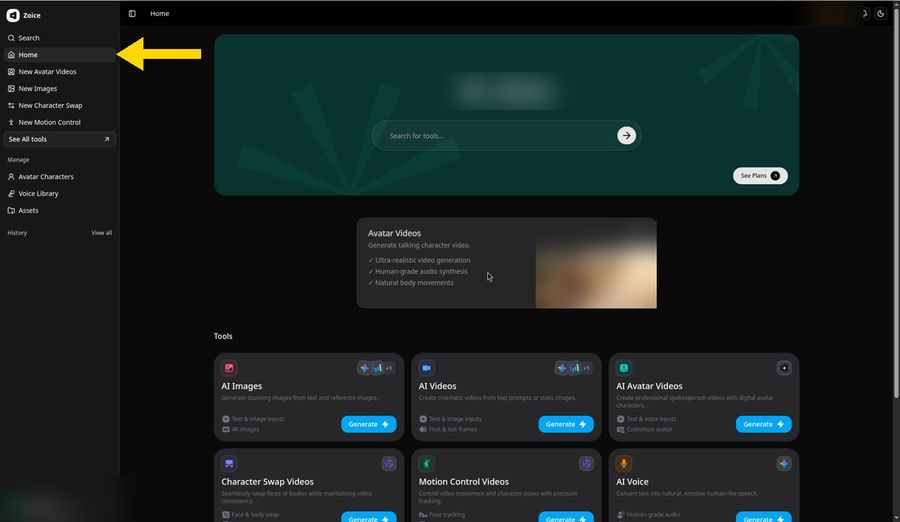
Go to app.zoice.com and sign in with your email and password, or with Google. New to Zoice? Click Sign up on the login form to create a free account first. After you sign in, the Zoice home page opens with Home selected in the left sidebar.
Step 2: Open New Avatar Videos
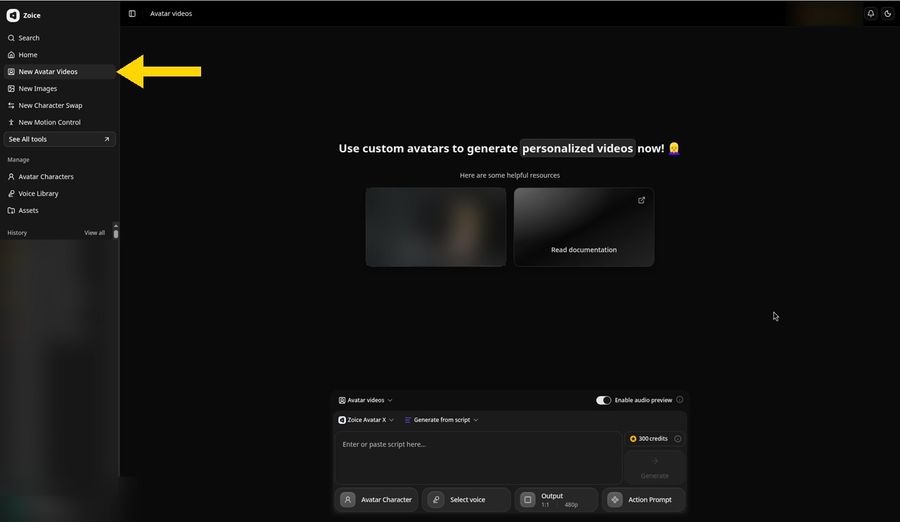
In the left sidebar, click New Avatar Videos. The item turns highlighted and the Avatar videos page loads with the composer at the bottom. Output starts at 1:1 and 480p. This is where every talking pet video starts.
Step 3: Click Avatar Character, Then Create New
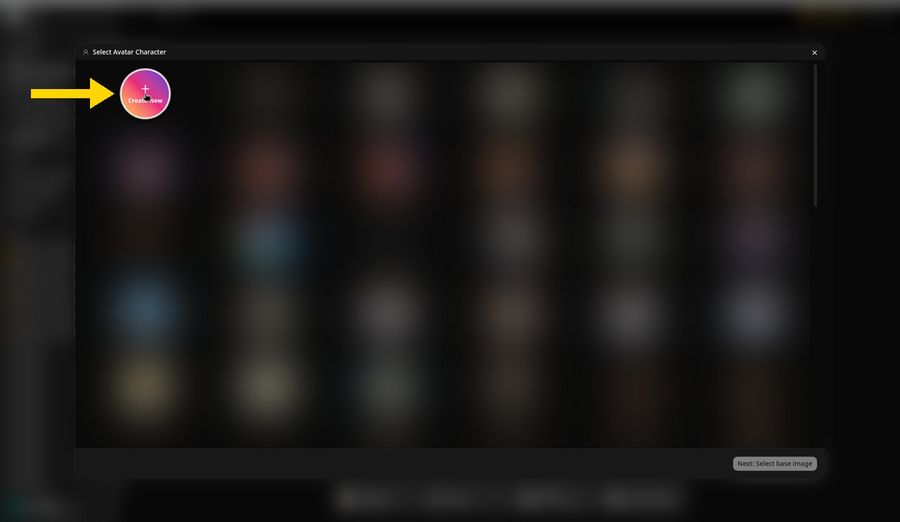
In the composer, click Avatar Character. The Select Avatar Character picker opens with Create New and any avatars you already saved. Click Create New to add your pet as a new avatar.
Step 4: Choose Upload Image
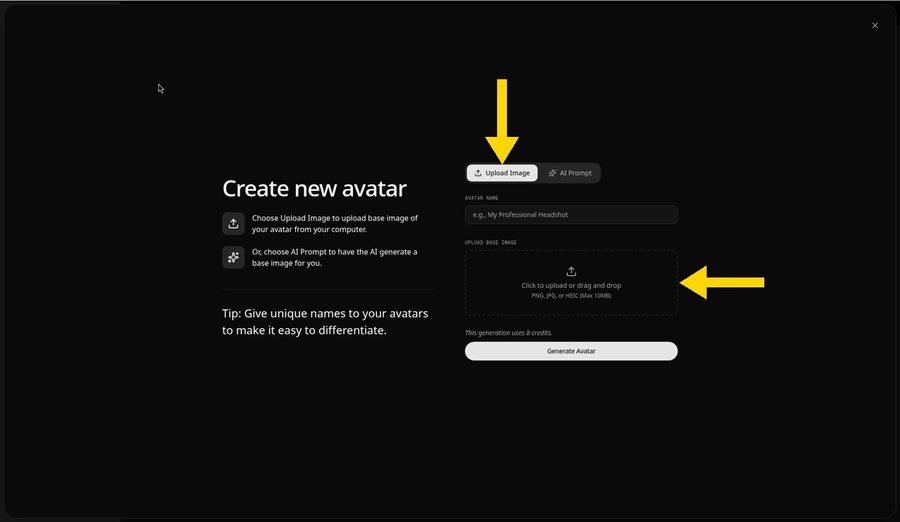
The Create new avatar panel opens. Keep the Upload Image tab selected, then click the upload area, or drag your file onto it. Zoice accepts PNG, JPG, and HEIC files up to 10 MB.
Step 5: Upload a Clear Pet Photo and Name It
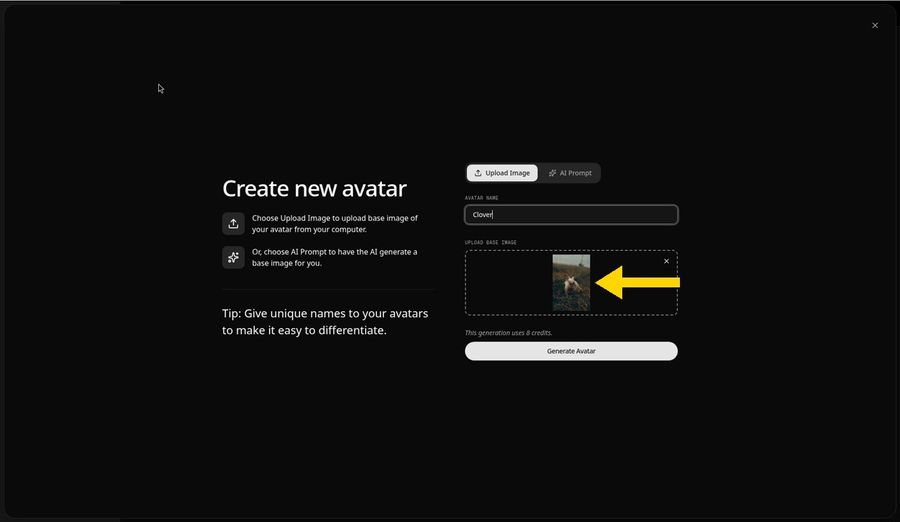
Pick the photo of your pet. A preview appears in the upload area. Then type a name in the Avatar Name field. We used Clover. The same rules work for dogs, cats, birds, and other pets.
- Use a front facing or slightly angled photo with the eyes open
- Choose a calm face, not a yawn or a bark
- Use soft, even light and avoid harsh shadows across the face
- Keep your pet alone in the frame, with no other faces
- Use a sharp photo, taken at your pet's eye level
Step 6: Click Generate Avatar
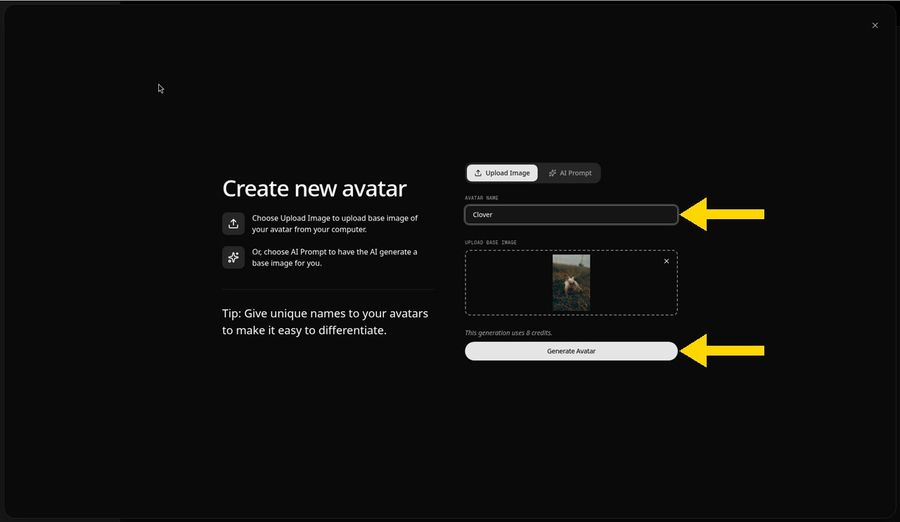
With the photo and the name set, click Generate Avatar. The panel notes that this generation uses 8 credits. Zoice saves your pet to Avatar Characters, so you can reuse it in any video.
Step 7: Open the Add Script Panel
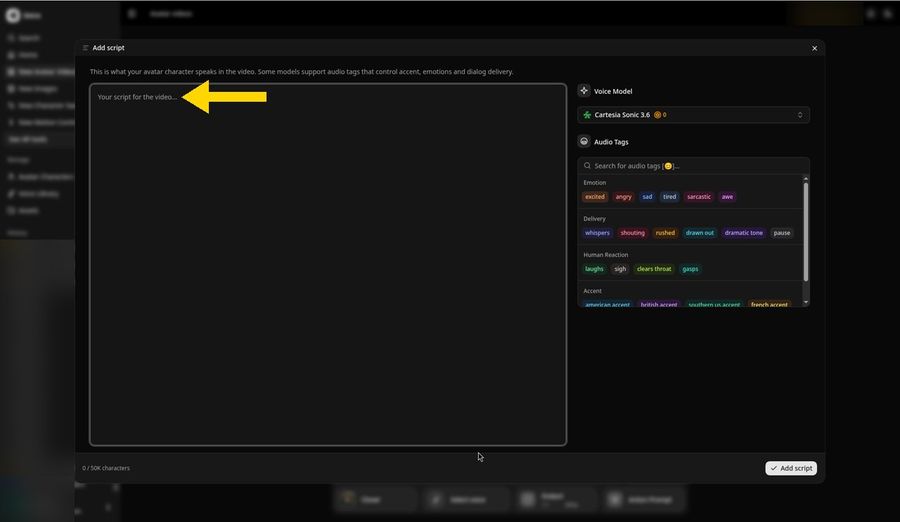
Back in the composer, click the script box to open the Add script panel. This is where you write the words your pet will say. The Voice Model and Audio Tags sit on the right.
Step 8: Choose the Cartesia Voice Model
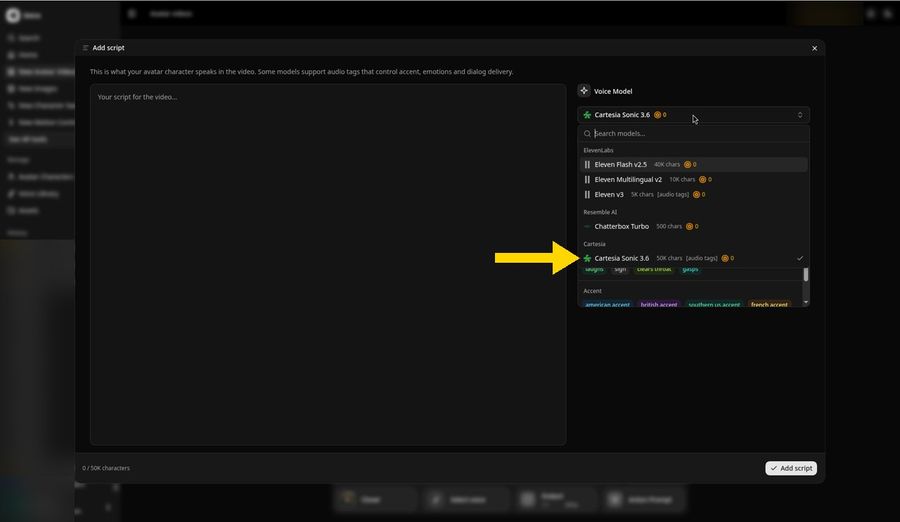
Open the Voice Model menu on the right and choose Cartesia Sonic 3.6 under Cartesia. It supports scripts up to 50K characters and audio tags, such as excited, whispers, or laughs. These tags shape how your pet delivers each line.
Step 9: Paste Your Pet Script and Click Add Script
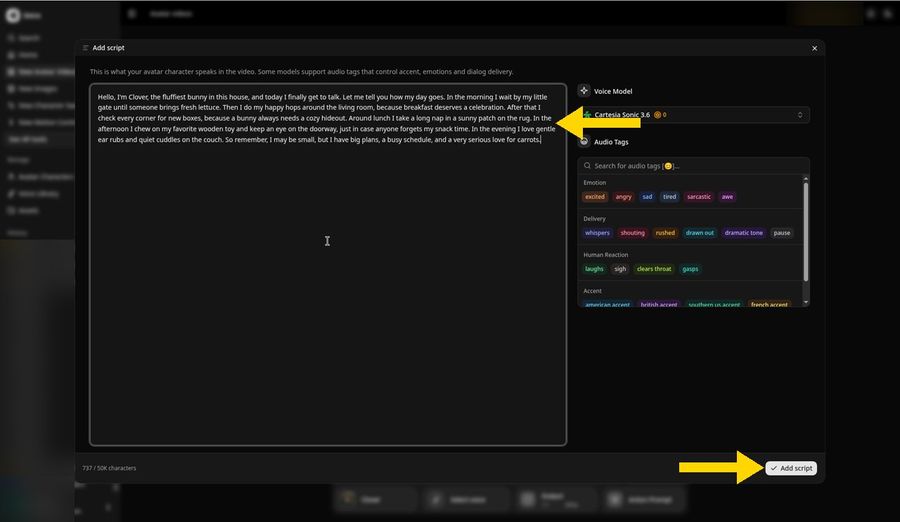
Type or paste the words your pet will say. Our script opens with "Hello, I'm Clover, the fluffiest bunny in this house, and today I finally get to talk." It ends with "So remember, I may be small, but I have big plans, a busy schedule, and a very serious love for carrots." Keep it short and fun. One story or one message is enough. Then click Add script.
Step 10: Pick the Sarah Voice
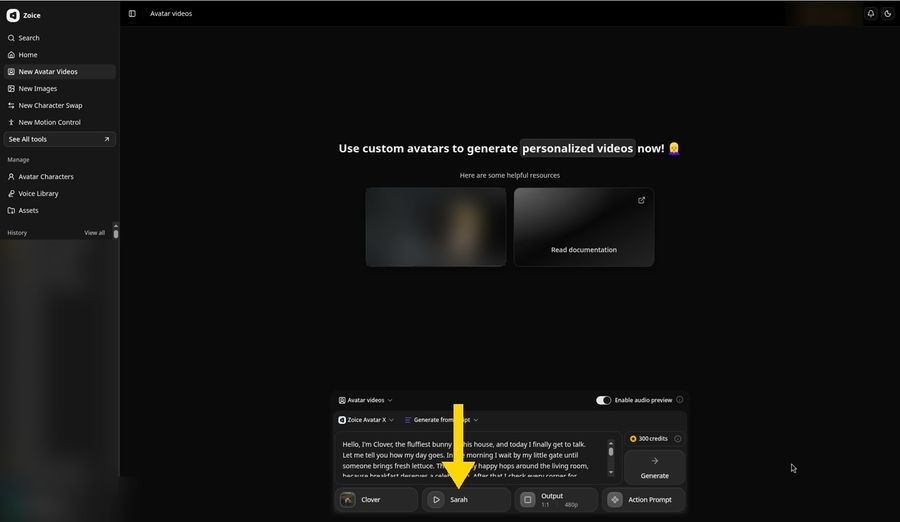
Click the voice button in the composer and pick a voice profile. We chose Sarah, so the composer now shows Clover, Sarah, and your script. Match the voice to your pet. A soft, friendly voice suits a bunny. A big, warm voice suits a large dog. You can also use a voice you cloned.
Step 11: Set 720p in Output
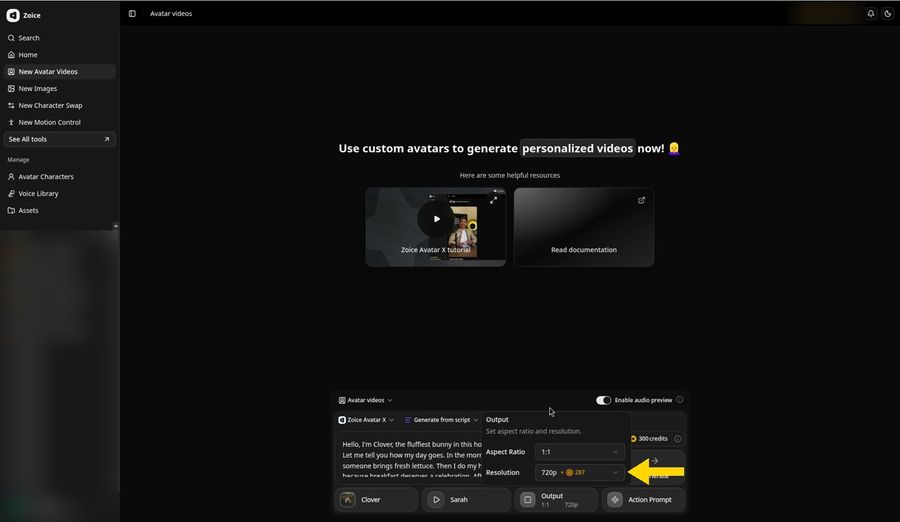
Click Output to open the Output popover, where you set the aspect ratio and the resolution. We picked 720p in the Resolution menu, so the Output button now reads 1:1 and 720p. Choose 9:16 for TikTok, Reels, and Shorts, or 16:9 for YouTube and the web. Higher resolutions use extra credits.
Step 12: Click Generate and Check the Audio Preview
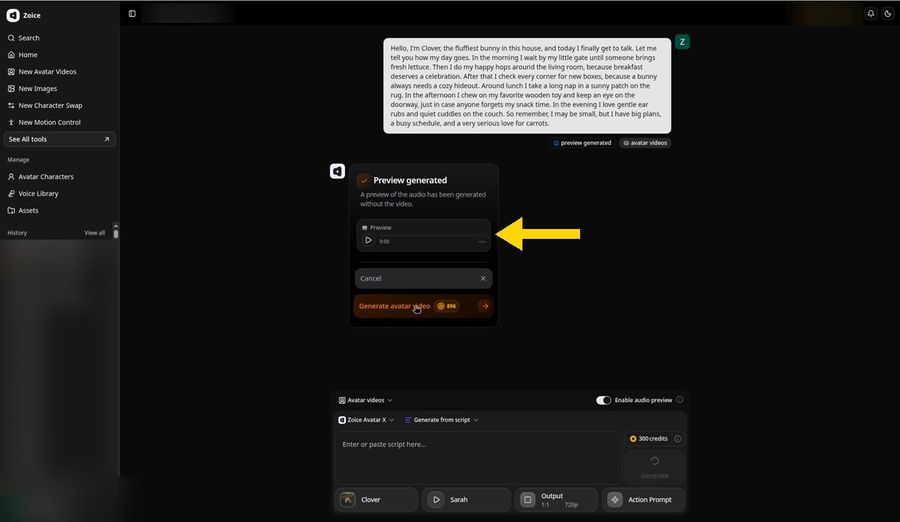
Check that your avatar, script, voice, and output are set, then click Generate. With Enable audio preview switched on, Zoice opens a new project and first makes an audio preview. Press play on the Preview card to check the words and the timing before the video is made.
Step 13: Click Generate Avatar Video
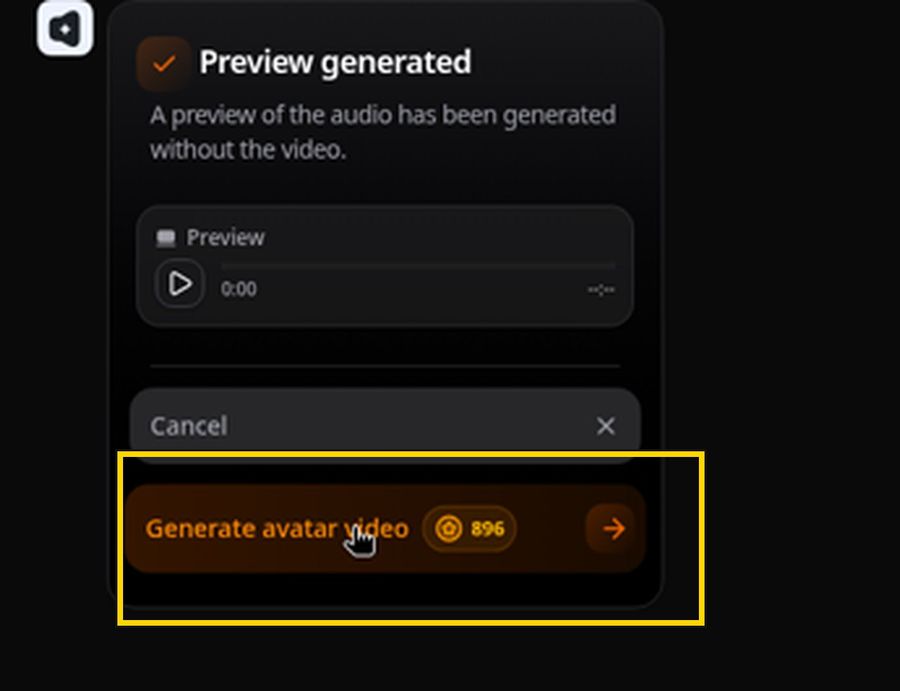
If the audio sounds right, click Generate avatar video on the card. The credit cost shows on the button. Want to change something? Click Cancel, edit the script, and generate a new preview.
Step 14: Wait While Zoice Processes the Video
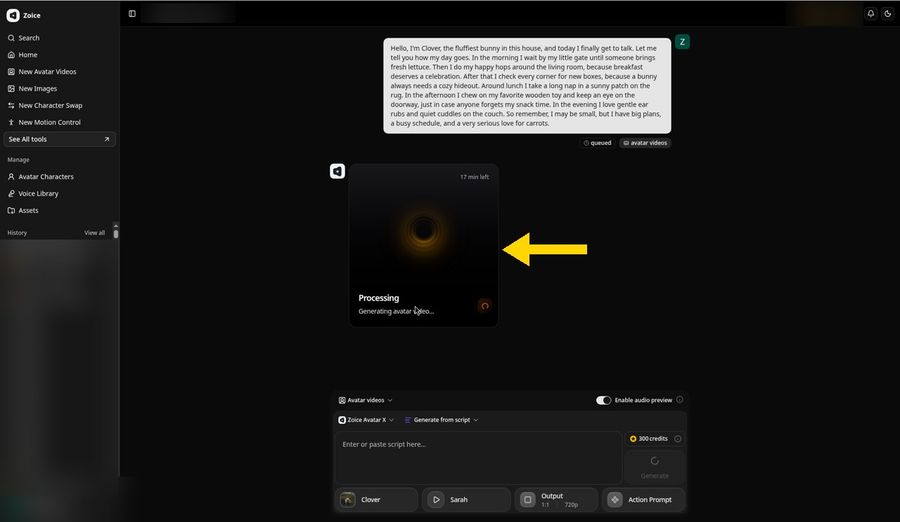
Zoice queues the request and shows a Processing card with the text Generating avatar video. The card shows an estimate of the time left, and ours showed 17 minutes. You can leave the page open or come back to the project later from History.
Step 15: Preview Your Talking Pet Video
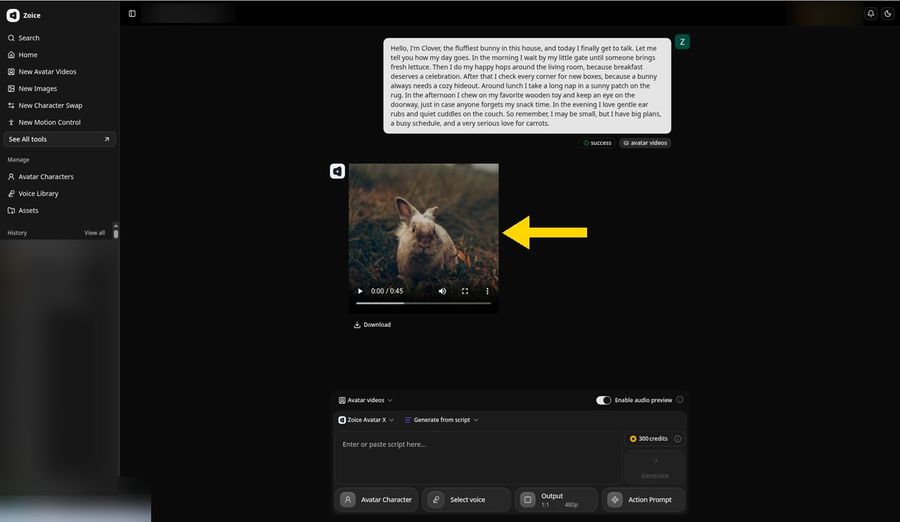
When the status changes to success, the video player appears. Our talking bunny video ran 0:45. Press play and check the lip sync and the voice. If something is off, change the script or the photo and generate again.
After the video finishes, the composer resets to 480p, but your finished video stays at 720p.
Step 16: Open the Player Menu and Click Download
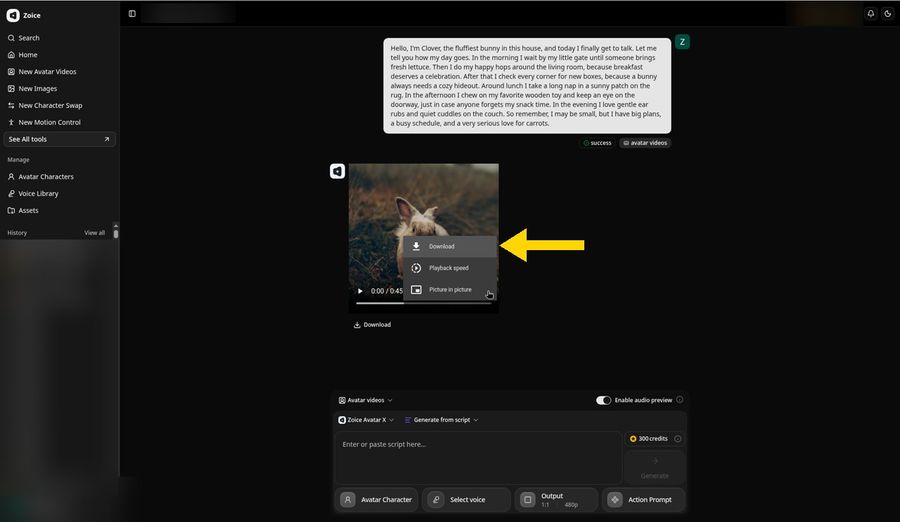
To save the video, click the three dot menu in the player and choose Download. You can also click the Download link below the player.
Step 17: Download and Share
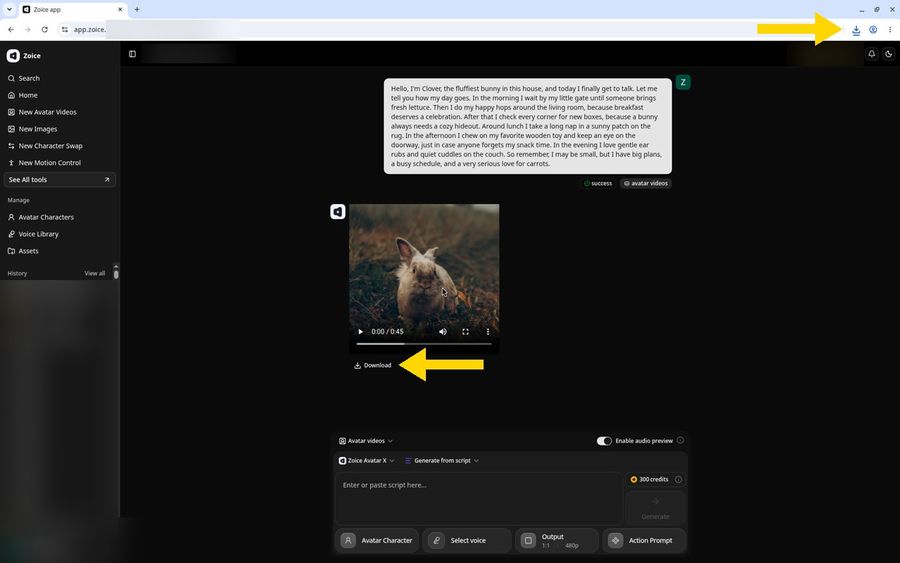
Your browser saves the video, and the download icon in the toolbar lights up when it is done. Then post it to TikTok, Instagram Reels, YouTube Shorts, or send it to friends and family. Only use photos you own, and only use audio you have the rights to use.
Tips for Best Results
- Shoot at eye level: it gives the cleanest lip sync
- Pick a calm photo: the eyes and the mouth area should be sharp
- Keep the script short: one story or one joke is enough
- Match the voice to your pet: soft for a bunny or a bird, bold for a big dog
- Preview the audio before you generate
- Use 9:16 for TikTok, Reels, and Shorts
Fun Ideas for Your Talking Video
Short and silly videos tend to win. Here are ideas to start with:
- Snack demand: your pet insists the treats are late
- Daily routine: your pet walks through a busy day of naps and snacks
- Birthday message: your pet wishes someone a happy birthday
- Pet review: your pet rates its new bed, toy, or cage
- Family intro: each pet in the house introduces itself
Ready to make a talking pet video of your own? Try Zoice.
FAQ
Can AI make my pet talk?
Yes. Upload a clear photo of your pet, add a script or audio, and an AI tool moves the mouth to match the words. In Zoice you do this in a few steps in your browser.
Which pets work best?
Dogs, cats, bunnies, birds, and other pets with a clear face all work. A sharp, front facing photo with the eyes open gives the best result.
Can I give my pet a funny voice?
Yes. Pick a voice that suits your pet, upload a recording, or clone a voice, and your pet will speak with it. We used the Sarah voice with the Cartesia Sonic 3.6 model.
Can I share it on TikTok?
Yes. Export a 9:16 video from Zoice and post it to TikTok, Reels, or Shorts. Use only photos you own and audio you have the rights to use.